

| 일 | 월 | 화 | 수 | 목 | 금 | 토 |
|---|---|---|---|---|---|---|
| 1 | 2 | 3 | ||||
| 4 | 5 | 6 | 7 | 8 | 9 | 10 |
| 11 | 12 | 13 | 14 | 15 | 16 | 17 |
| 18 | 19 | 20 | 21 | 22 | 23 | 24 |
| 25 | 26 | 27 | 28 | 29 | 30 | 31 |
- jquery
- git
- Controller
- React
- Oracle
- Scanner
- 조건문
- Database
- Uipath
- Board
- Eclipse
- html
- Array
- jsp
- 상속
- View
- rpa
- JDBC
- db
- spring
- API
- 이클립스
- Java
- string
- mysql
- Thymeleaf
- 문자열
- MVC
- SpringBoot
- 배열
- Today
- Total
유정잉
33일차 Java [ Gson, Json, jQuery ] 본문
Maven Repository: Search/Browse/Explore (mvnrepository.com)
Maven Repository: com.google.code.gson » gson (mvnrepository.com)
Gson 사용하는 이유 !!!
나중에 프로젝트 할때 네이버지도, 구글지도등 api 데이터를 가져올 때 필요함 !!!
api데이터를 java로 가져오는 법
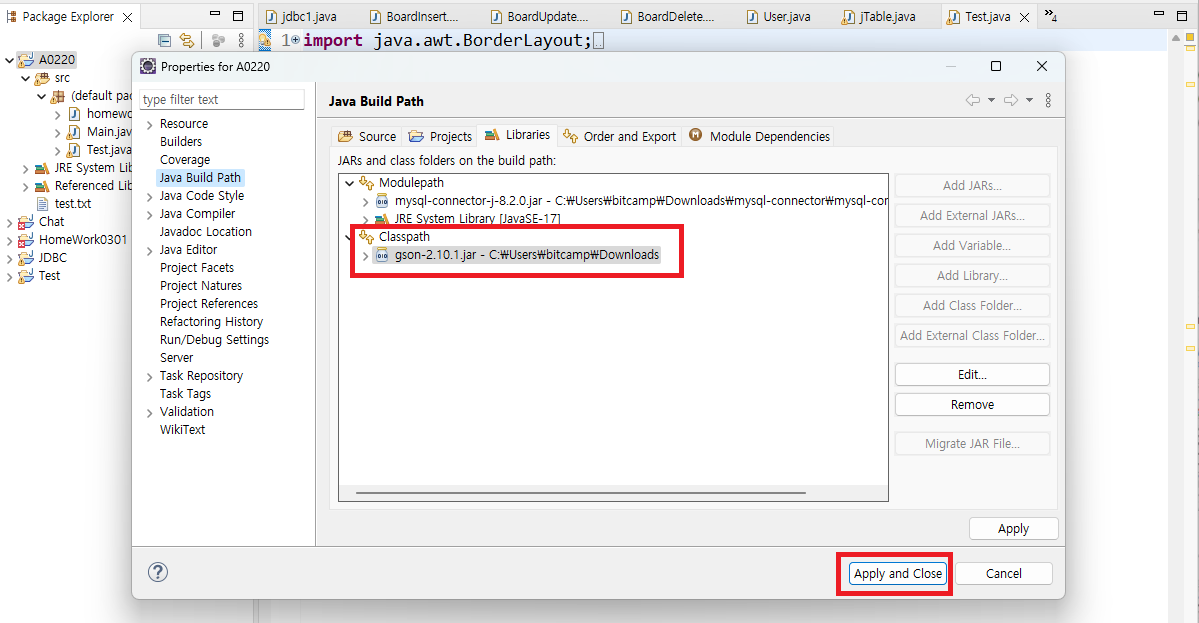
[ eclipse와 Gson 연결하기 ]
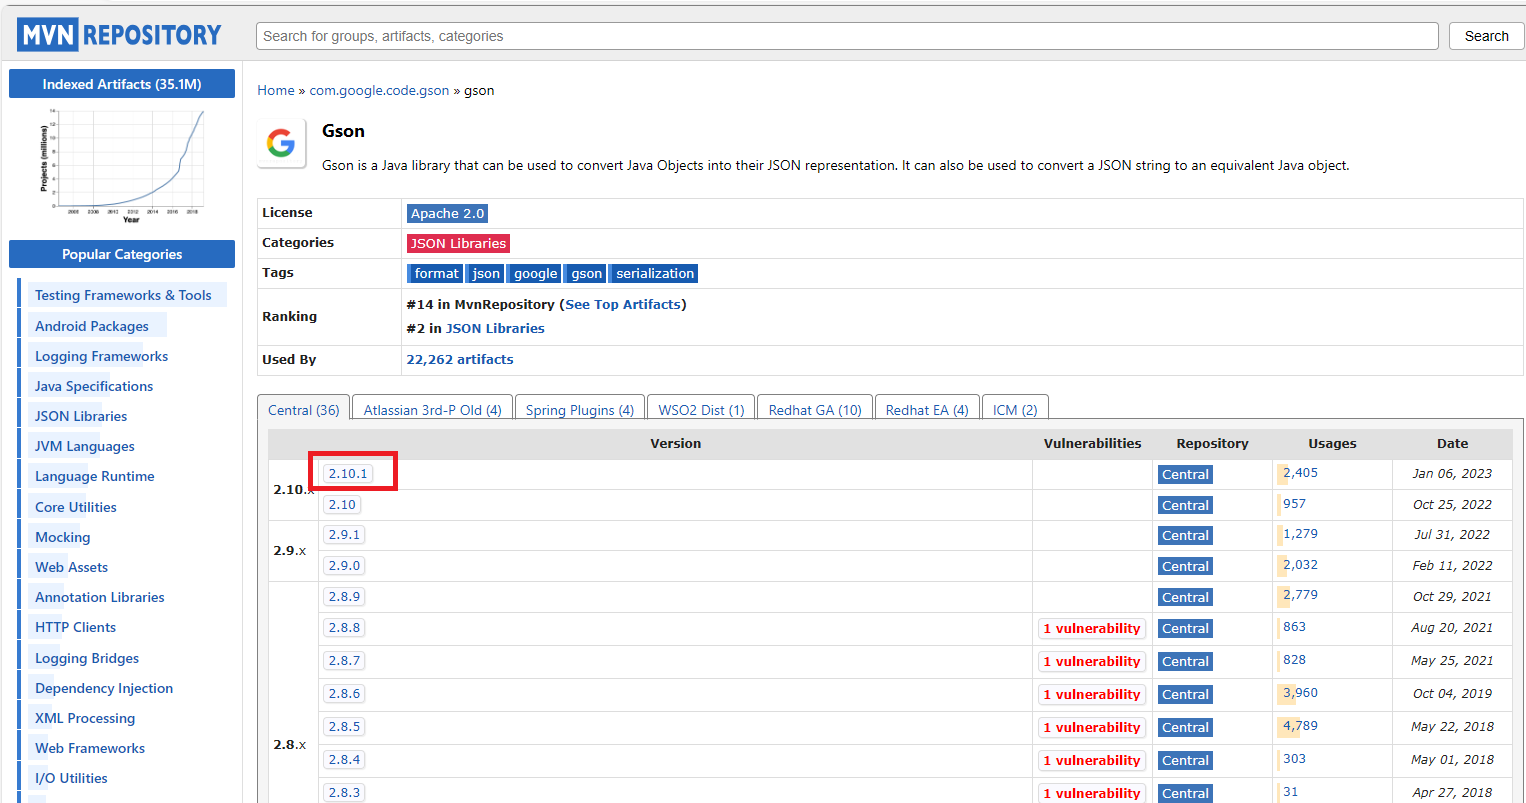
1) Google에 mvn 검색
2) mvn 사이트에서 Gson 검색
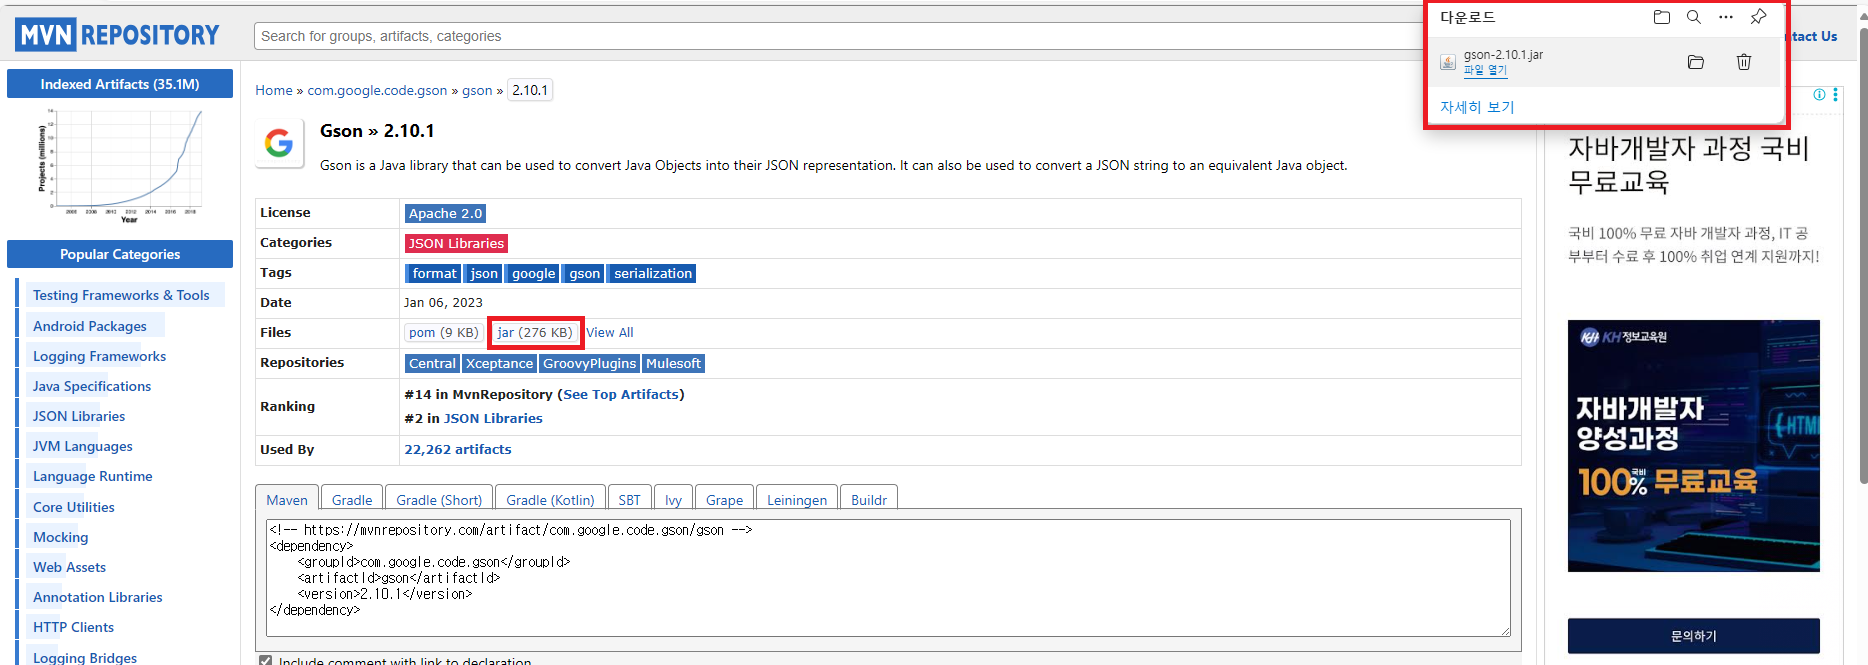
3) 클릭 후 최신버전 클릭 -> jar 파일 다운로드
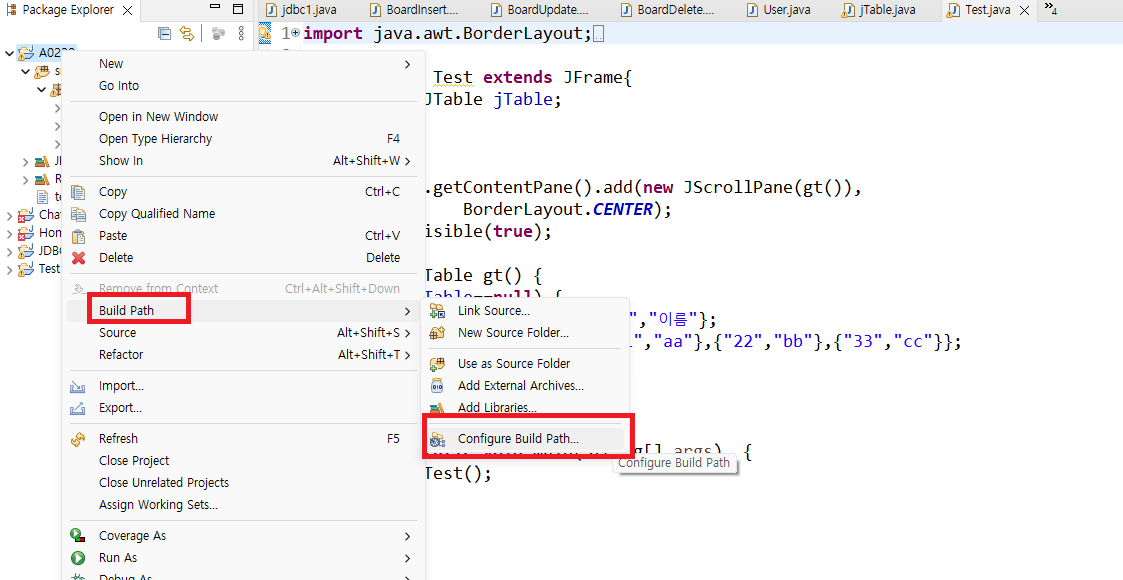
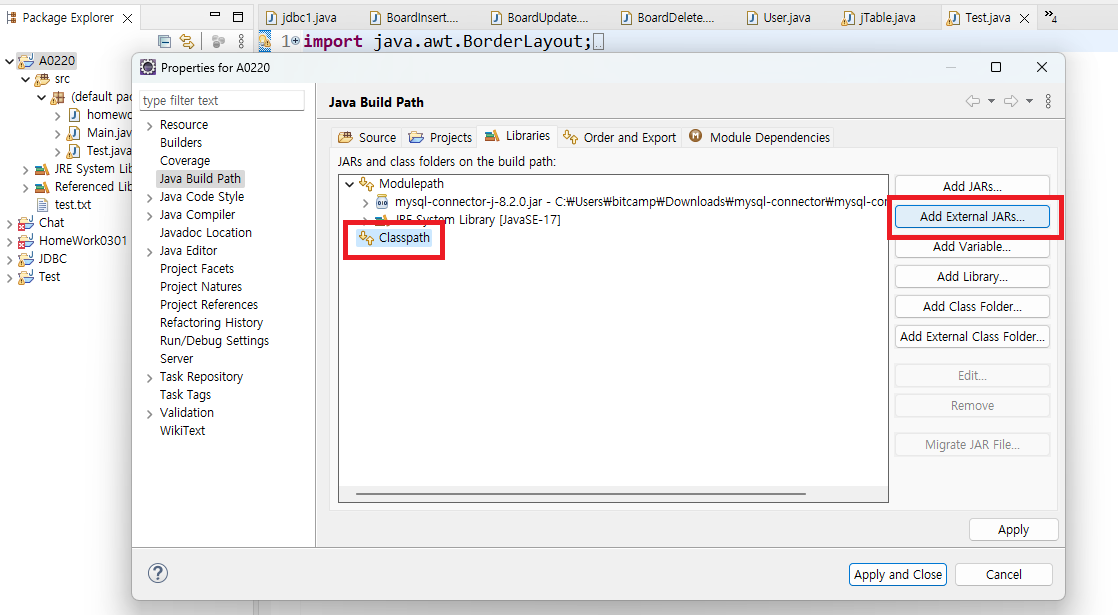
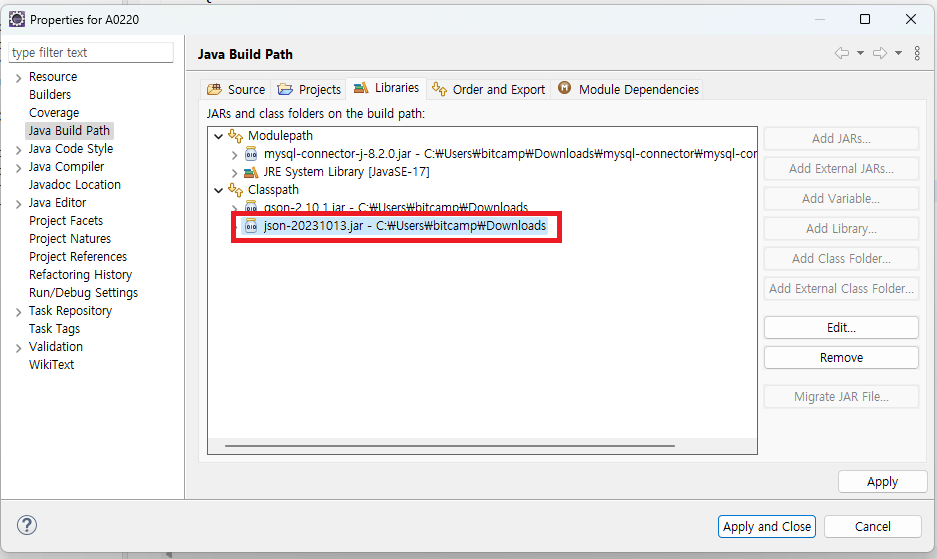
4) 이클립스 -> Build Path -> Configure Build Path -> Class Path 클릭 후 -> Gson 파일 추가
-> Referenced Library에 gson-2.10.1.jar 파일 추가 된 것 확인
[ eclipse와 Gson 활용하기 ]
1) default package외에 새로운 package 생성
2) 새로운 package에 DTO class 생성
3) 필드선언 , 생성자생성, Getter&Setter 생성,
package kr.bit; //새로운 패키지

public class FoodDTO { // DTO : 데이터 전달 객체
	private String name;
	private int price;
	private String rest;

	public FoodDTO() {} //기본생성자 1개
	public FoodDTO(String name, int price, String rest) { //매개변수 3개
		this.name=name;
		this.price=price;
		this.rest=rest;
	}
	public String getName() {
		return name;
	}
	public void setName(String name) {
		this.name = name;
	}
	public int getPrice() {
		return price;
	}
	public void setPrice(int price) {
		this.price = price;
	}
	public String getRest() {
		return rest;
	}
	public void setRest(String rest) {
		this.rest = rest;
	}
	@Override
	public String toString() {
		return "FoodDTO[name=" + name + ", price=" + price + ", rest=" + rest + "]";
	}

}
import java.util.ArrayList; //기본 패키지
import java.util.List;
import com.google.gson.Gson;
import com.google.gson.reflect.TypeToken;
import kr.bit.FoodDTO; //FoodDTO객체를 생성하려면 필요함
public class Test {
public static void main(String[] args) {
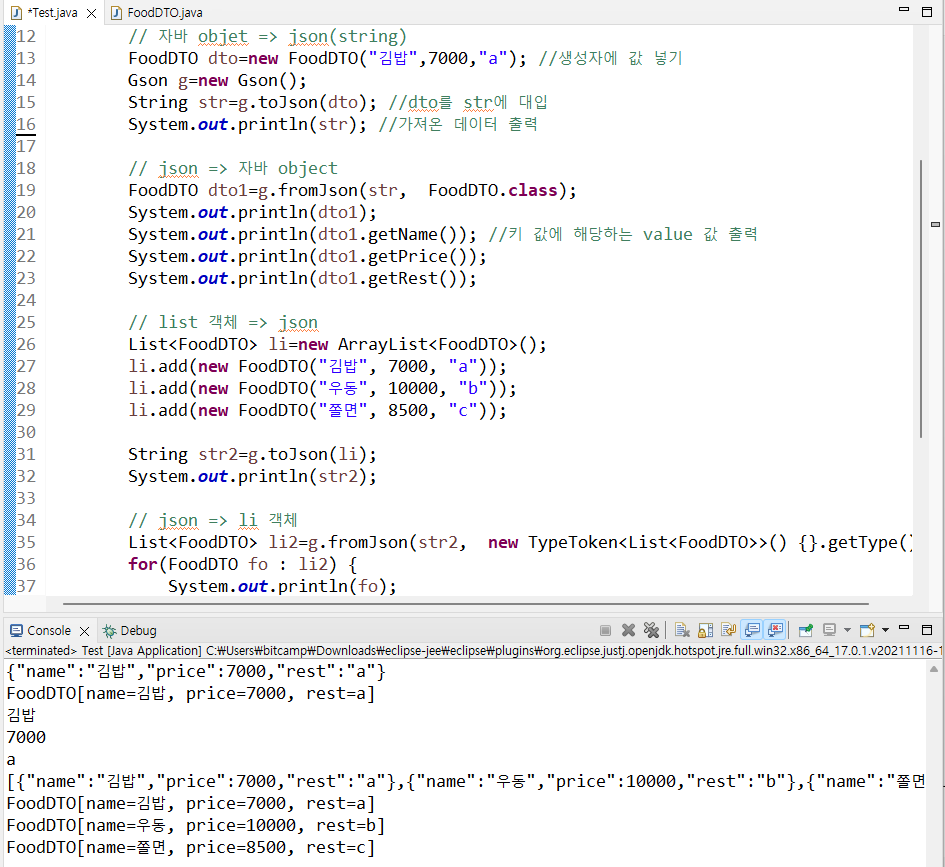
// 자바 objet => json(string)
FoodDTO dto=new FoodDTO("김밥",7000,"a"); //생성자에 값 넣기
Gson g=new Gson();
String str=g.toJson(dto); //dto를 str에 대입
System.out.println(str); //가져온 데이터 출력
// json => 자바 object
FoodDTO dto1=g.fromJson(str, FoodDTO.class);
System.out.println(dto1);
System.out.println(dto1.getName()); //키 값에 해당하는 value 값 출력
System.out.println(dto1.getPrice());
System.out.println(dto1.getRest());
// list 객체 => json
List<FoodDTO> li=new ArrayList<FoodDTO>();
li.add(new FoodDTO("김밥", 7000, "a"));
li.add(new FoodDTO("우동", 10000, "b"));
li.add(new FoodDTO("쫄면", 8500, "c"));
String str2=g.toJson(li);
System.out.println(str2);
// json => li 객체
List<FoodDTO> li2=g.fromJson(str2, new TypeToken<List<FoodDTO>>() {}.getType());
for(FoodDTO fo : li2) {
System.out.println(fo);
}
//api 네이버 지도 구글지도 위도 경도 등등 데이터들이 json으로 들어가있어서 자바로 가져오는 법 !!
// json : [ {aaa:123}, {bb:3444} ];
// gson : java 객체를 json으로 변환
// json을 java객체로 변환
}
}
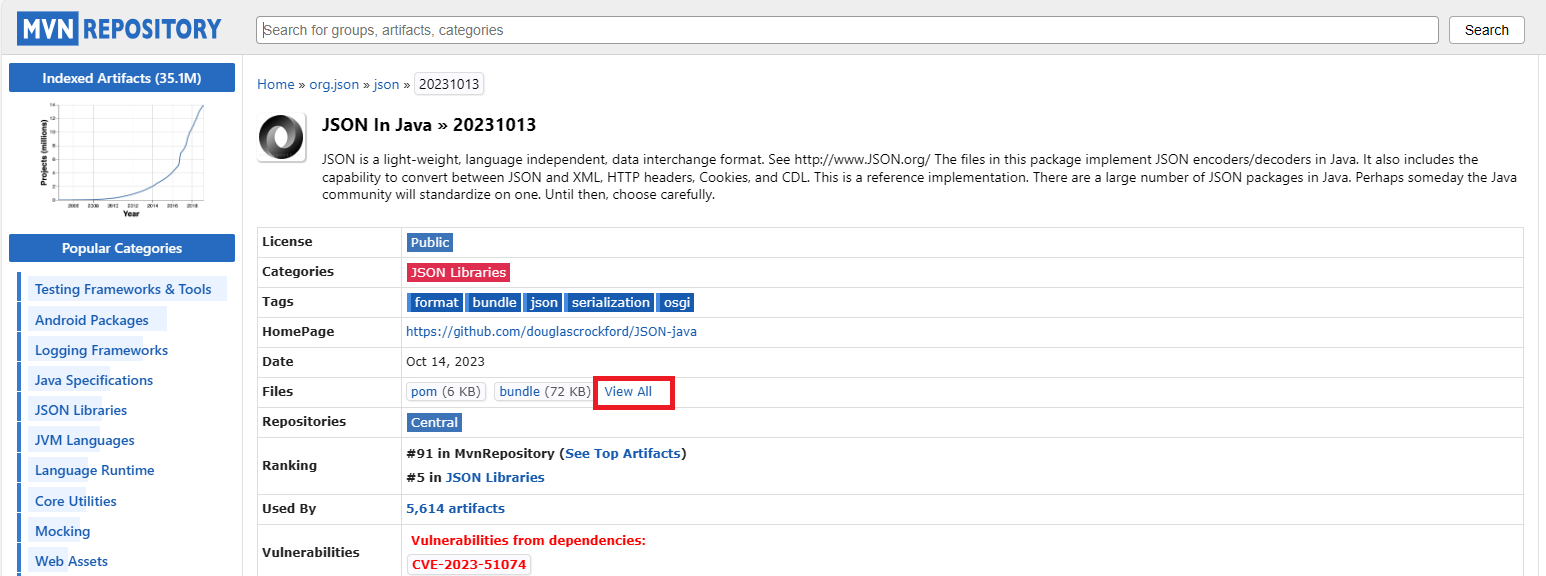
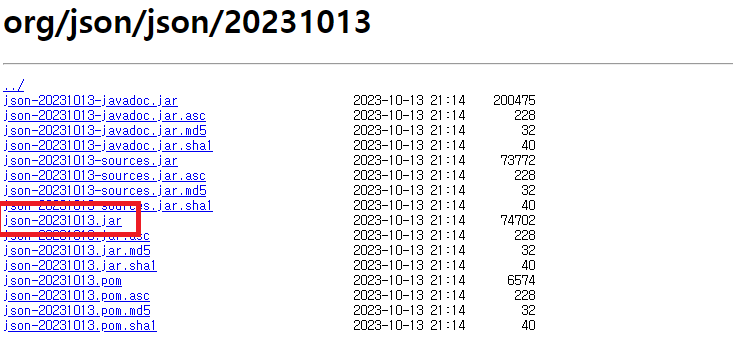
[ eclipse와 Json 연결하기 ]
1) mvn 검색창에 json 검색 -> jar 파일 다운로드 ( 최신 것 중 Usages가 젤 높은 것)
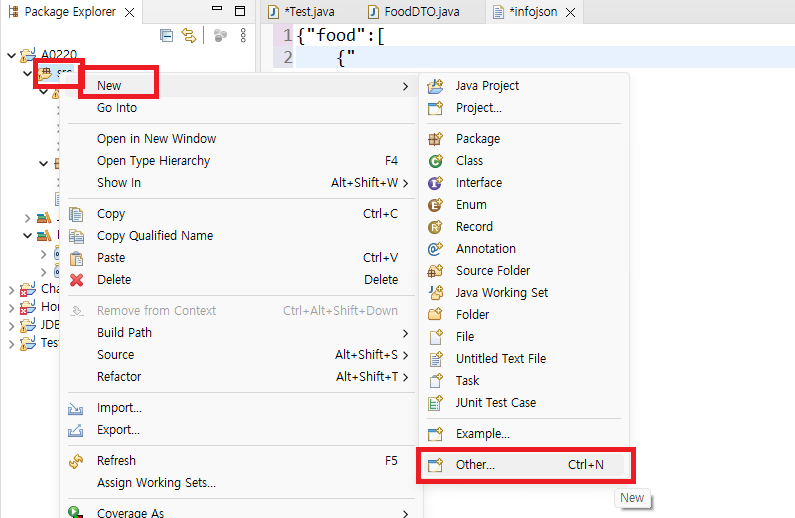
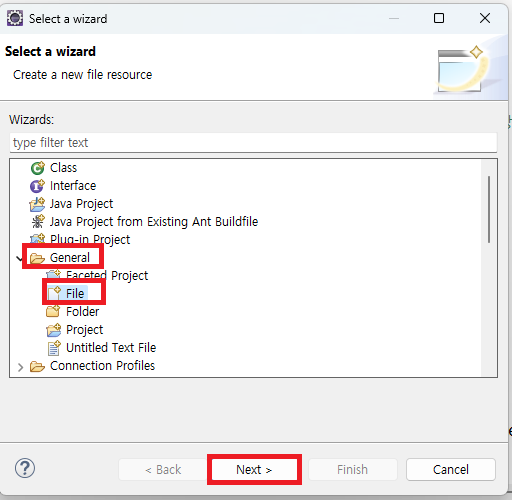
2) src -> New -> Others -> General -> File -> Next => text File 생성

[ eclipse와 Json 활용하기 ]
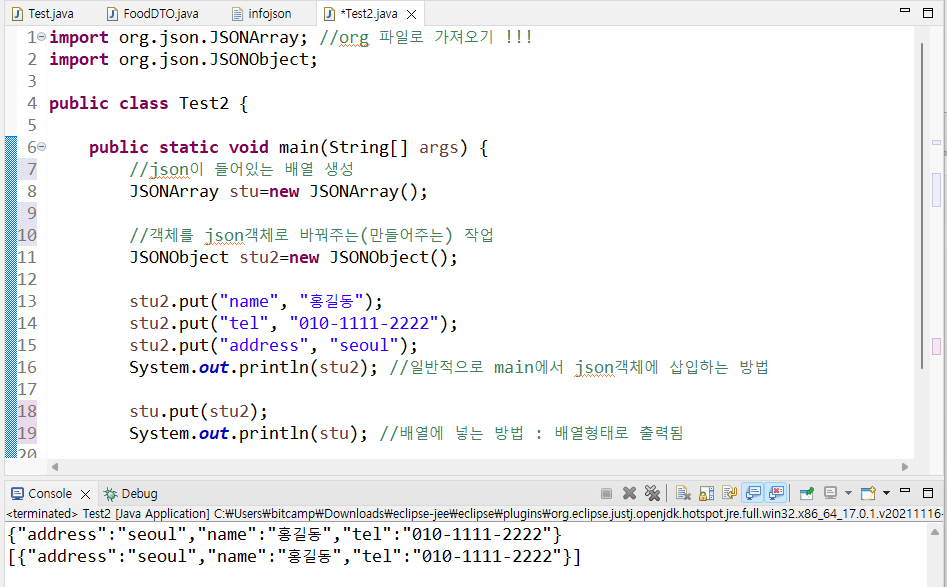
1) File 활용 없이 그냥 하는 법
import org.json.JSONArray; //org 파일로 가져오기 !!!
import org.json.JSONObject;

public class Test2 {

	public static void main(String[] args) {
		//json이 들어있는 배열 생성
		JSONArray stu=new JSONArray();

		//객체를 json객체로 바꿔주는(만들어주는) 작업
		JSONObject stu2=new JSONObject();

		stu2.put("name", "홍길동");
		stu2.put("tel", "010-1111-2222");
		stu2.put("address", "seoul");
		System.out.println(stu2); //일반적으로 main에서 json객체에 삽입하는 방법

		stu.put(stu2);
		System.out.println(stu); //배열에 넣는 방법 : 배열형태로 출력됨

	}

}
2) 같은 package에 File 생성하고 그 File을 불러오는 방식
src -> New -> Others -> General -> File -> Next => text File 생성
// File 생성 같은 package에 생성해야 함 !!!
{"food":[
{
"address":"seoul",
"phone":"010-1111-2222",
"name" : "hong"
},
{
"addredd":"busan",
"phone":"010-6666-8777"
"name":"kim"
}
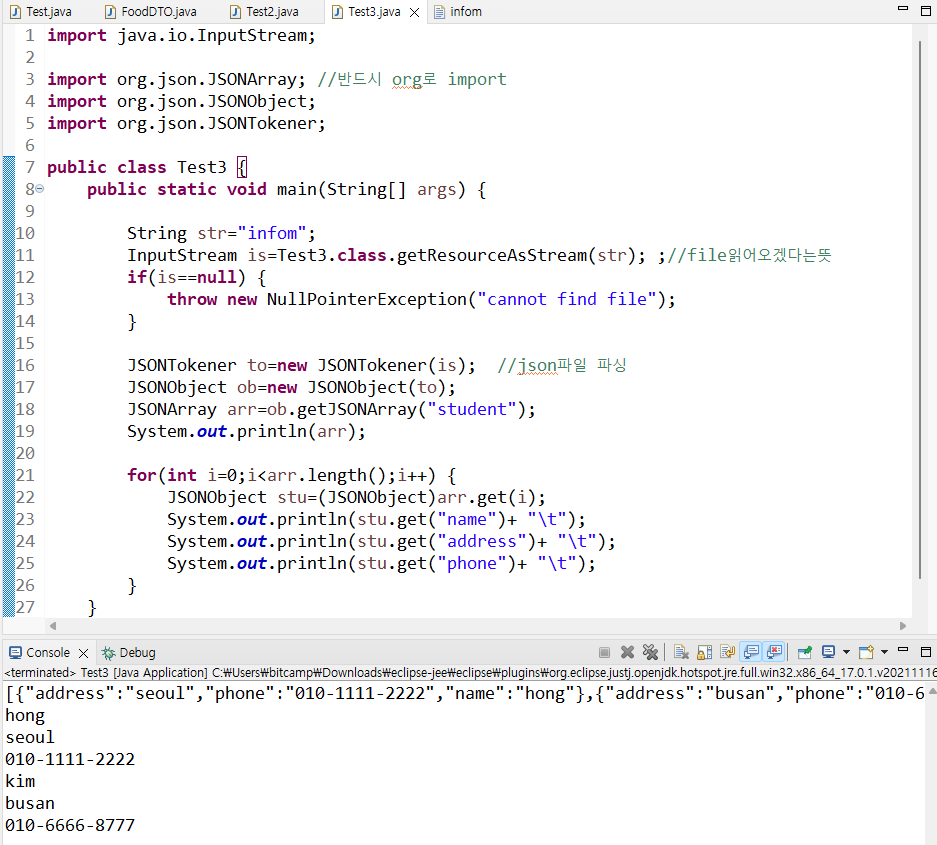
]}import java.io.InputStream;
import org.json.JSONArray; //반드시 org로 import
import org.json.JSONObject;
import org.json.JSONTokener;
public class Test3 {
public static void main(String[] args) {
String str="infom";
InputStream is=Test3.class.getResourceAsStream(str); ;//file읽어오겠다는뜻
if(is==null) {
throw new NullPointerException("cannot find file");
}
JSONTokener to=new JSONTokener(is); //json파일 파싱
JSONObject ob=new JSONObject(to);
JSONArray arr=ob.getJSONArray("student");
System.out.println(arr);
for(int i=0;i<arr.length();i++) {
JSONObject stu=(JSONObject)arr.get(i);
System.out.println(stu.get("name")+ "\t");
System.out.println(stu.get("address")+ "\t");
System.out.println(stu.get("phone")+ "\t");
}
}
}
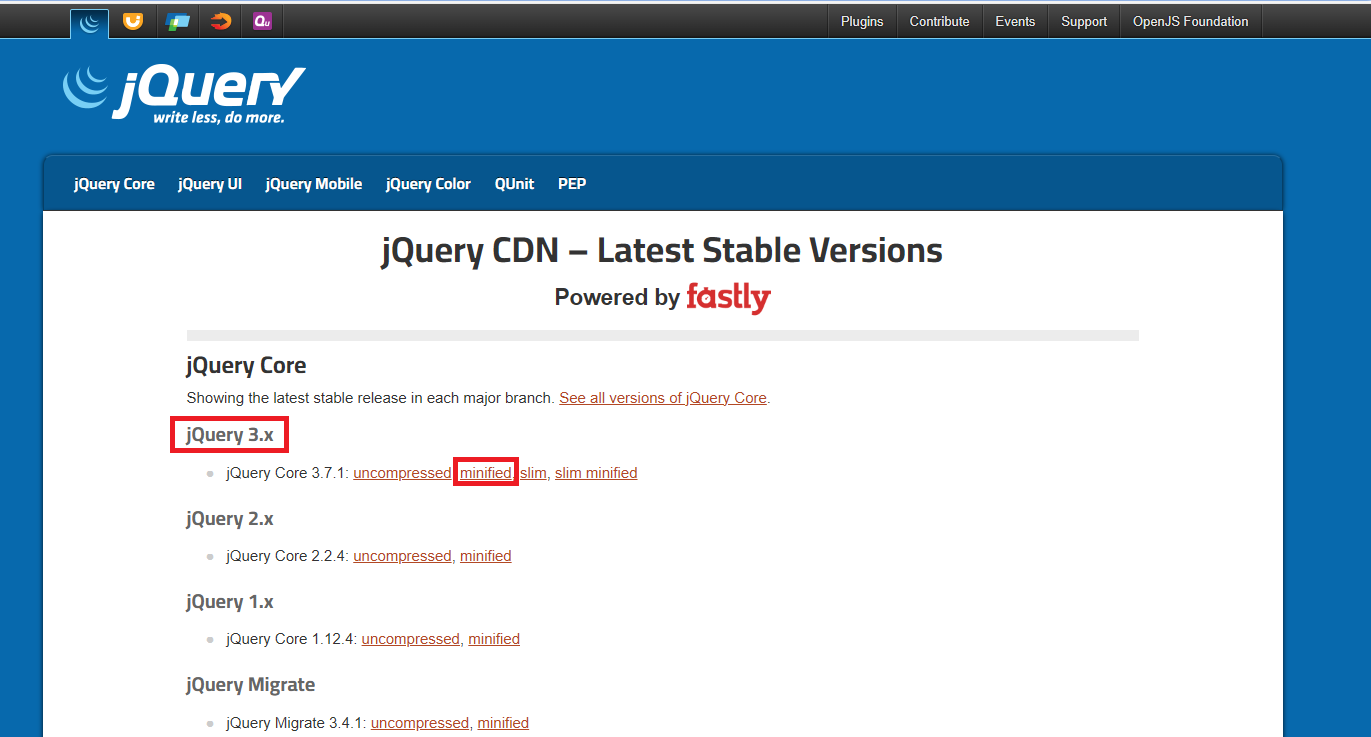
jQuery CDN
jQuery CDN – Latest Stable Versions jQuery Core Showing the latest stable release in each major branch. See all versions of jQuery Core. jQuery 3.x jQuery 2.x jQuery 1.x jQuery Migrate jQuery UI Showing the latest stable release for the current and legac
releases.jquery.com
[ jQuery ]
1) Google에 제이쿼리 CDN 검색
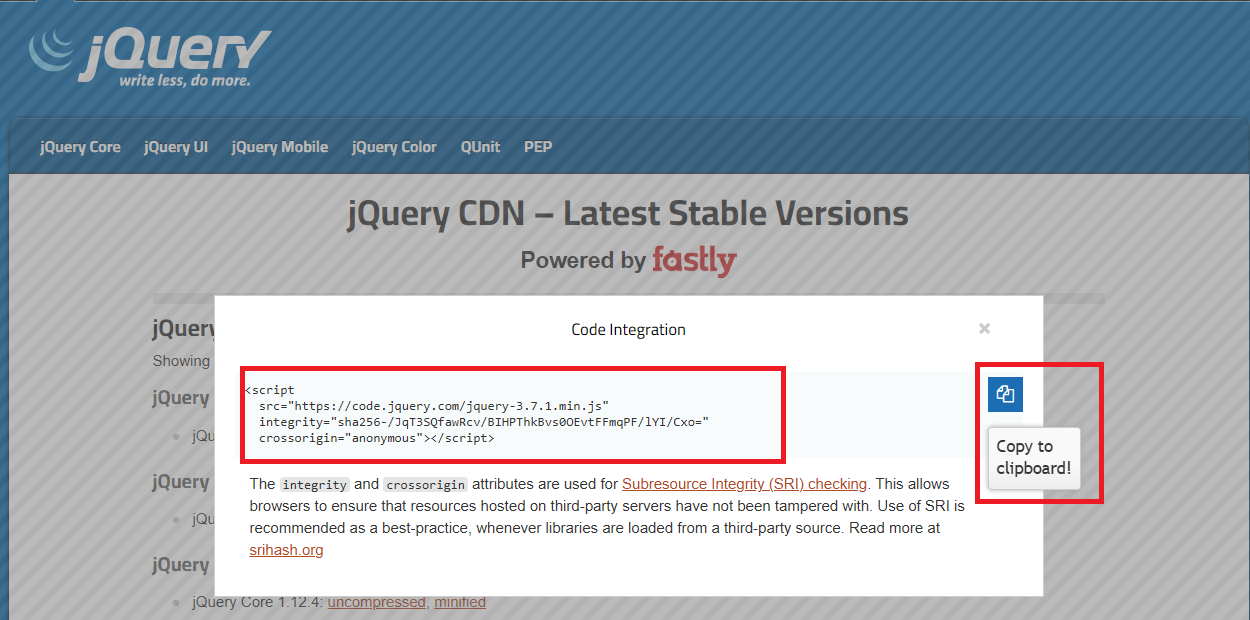
2) 제일 최신버전 -> minified 클릭 -> 링크 복사
3) <head>와</head> 사이에 복사한 링크 삽입
[ jQuery 기본적인 구조 ]
1) css함수 : 스타일 변경 메서드 (스타일만 변경 가능 다른건 변경 불가능)
$('선택자').css('속성' , '값'); //속성값이 하나 일 땐 쉼표(,) 사용
$('선택자').css({'속성':'값' , '속성':'값'}); //속성값이 여러개 일 땐 중괄호{} 와 콜론(:) 사용
2) children() : 선택자를 기준으로 자식요소 선택하는 메서드
=> $('선택자').children('선택자');
find() : 선택자를 기준으로 자손요소 선택하는 메서드
=> $('선택자').find('선택자');
3) siblings() : 선택자 기준으로 형제요소 선택하는 메서드
=> $('선택자').siblings ('선택자');
parent() : 선택자 기준으로 부모요소 선택하는 메서드
=> $('선택자').parent ('선택자');
4) next(), prev(), nextAll(), nextUntil(), prevUnil() : next랑 prev 제일 많이 사용 됨
next() : 선택자 다음으로 다음꺼 prev() : 이전꺼
5) eq(index) , 요소:first-child, 요소:last-child, 요소:nth-child
6) 요소:gt(index) , 요소:lt(index), 문서객체.not('선택자'), 문서객체.has('선택자')
gt(<) : 선택된 인덱스부터 다음의 모든 요소 선택
lt(>) : 선택된 인덱스부터 이전의 모든 요소 선택
not() : 선택자 제외하고(=이외) 모든 요소 선택
has() : 선택요소를 포함(has)한 요소만 선택
<!DOCTYPE html>
<html lang="en">
<head>
	<script src="https://code.jquery.com/jquery-3.7.1.min.js" ></script>
	<script>
		$(document).ready(function() {
			//실행코드
		});

		$(function() {

		});
	</script>
</head>
<body>
	<script>
		//실행코드
	</script>
</body>
</html>
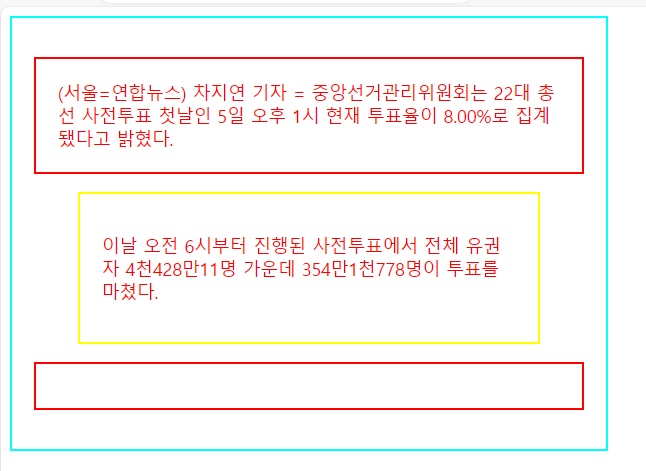
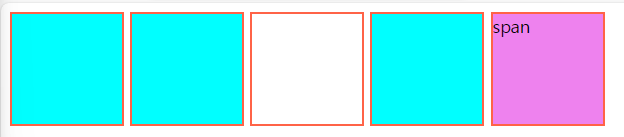
[ jQuery 응용 해보기 - 1 CSS 함수 ]

[ jQuery 응용 해보기 - 2 children(), find() 함수 ]
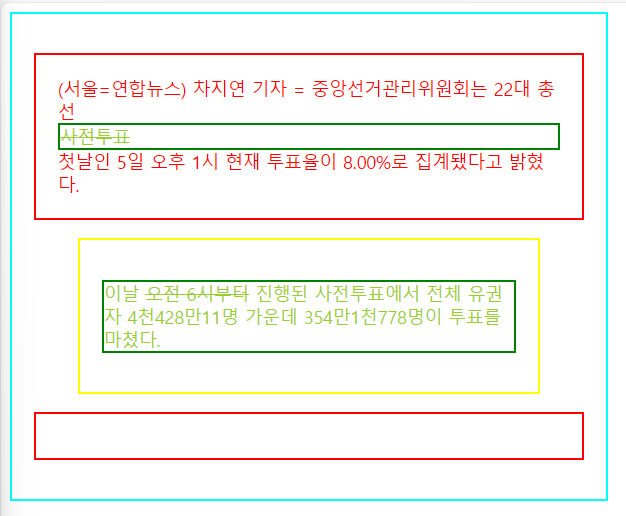
[ jQuery 응용 해보기 - 3 siblings(), parent() 함수 ]
[ jQuery 응용 해보기 - 4 next(), prev() 함수 ]
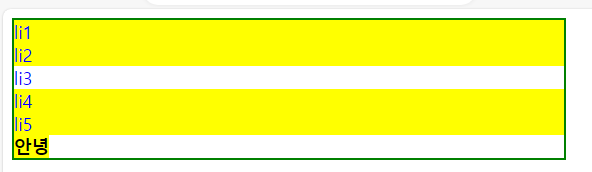
[ jQuery 응용 해보기 - 5 eq(index), 요소:first-child, 요소:last-child, 요소-nth-child 함수 ]

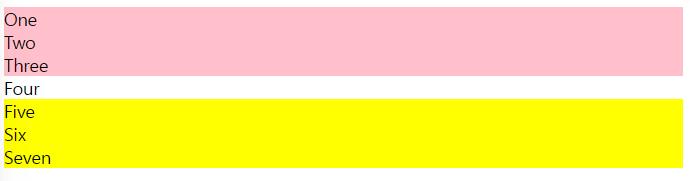
[ jQuery 응용 해보기 - 6 요소:gt(index),요소:lt(index),문서객체.not('선택자'),문서객체.has('선택자') 함수 ]
gt(<) : 선택된 인덱스부터 다음의 모든 요소 선택
lt(>) : 선택된 인덱스부터 이전의 모든 요소 선택
not() : 선택자 제외하고(=이외) 모든 요소 선택
has() : 선택요소를 포함(has)한 요소만 선택
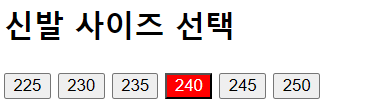
[ jQuery 응용 해보기 - 7 이벤트 처리 addClass, removeClass, toggleClass 버튼 클릭 ]
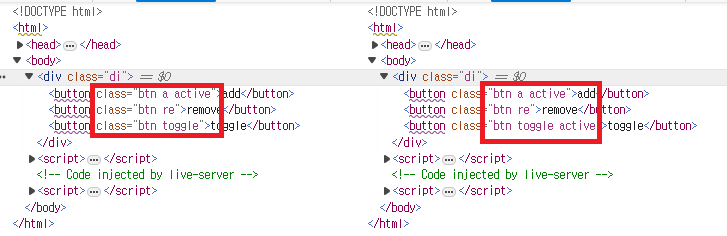
[ alt + shift + 방향키 아래 or 위 ] -> 복사
'네이버 클라우드 부트캠프 > 복습 정리' 카테고리의 다른 글
| 35~36일차 jQuery [ 복습 ] (0) | 2024.04.11 |
|---|---|
| 34일차 jQuery [ jQuery ] (0) | 2024.04.08 |
| 30~32일차 JavaScript [ 코드 복습 ] (0) | 2024.04.02 |
| 29일차 JavaScript [ 문서 객체 모델, Node ] (1) | 2024.04.01 |
| 28일차 JavaScript [ 객체, 내장객체 ] (0) | 2024.03.29 |


